Demo Manual for ARTPEC-8
How to Install & Set Up the Shopping Cart Tracker – Axis ACAP App
Introduction
The Shopping Cart Tracker application monitors the movement of shopping carts. It identifies when they cross a designated line in the wrong direction—an indicator of potential theft through the store entrance. When such an event is detected, the system triggers a camera event named “ShoppingCartTrackerAlarm.” At the same time, the video stream highlights the cart with a red bounding box and the label “Triggered Alarm!”, drawing immediate attention to the incident.
Installation

Setup
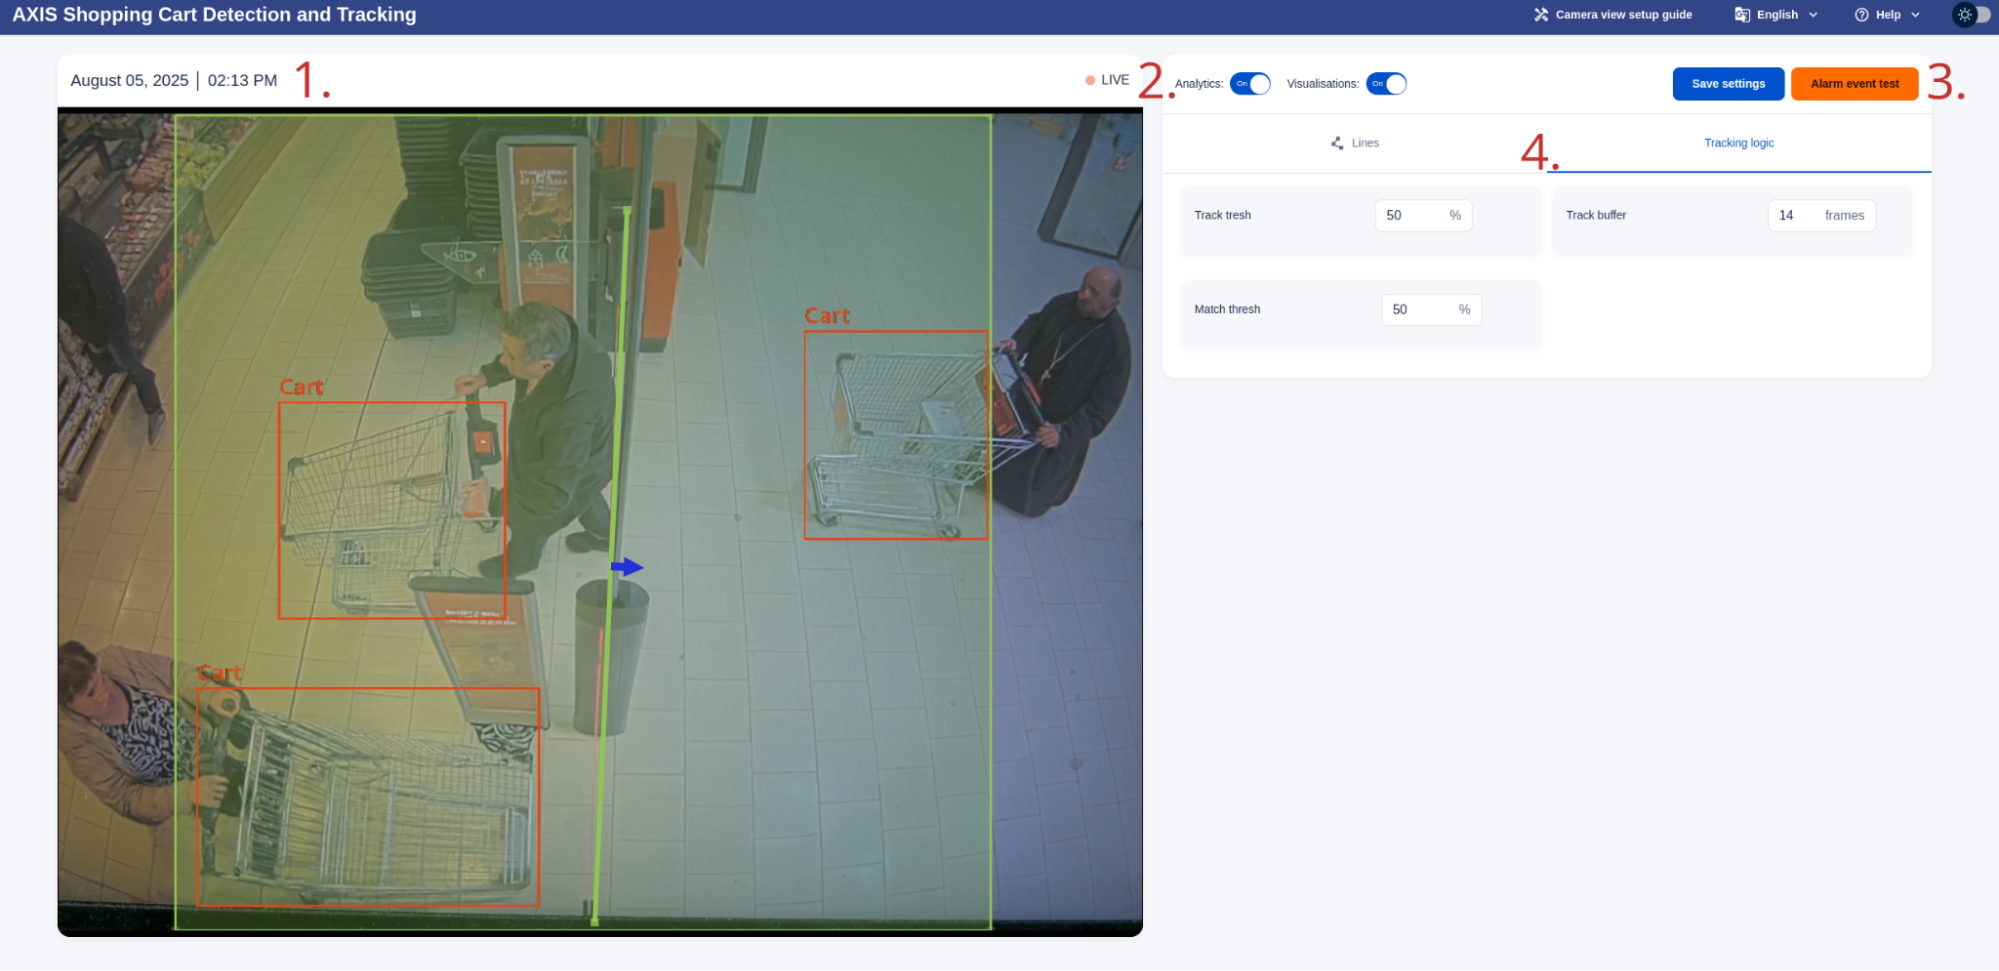
When you open the frontend, you will see the view shown in the screenshot above. We have marked four key areas of interest:

1. The View
- Displays the camera view with Visualisations overlays (if enabled).
- Shows the Region of Interest (ROI) (green square) and the Decision Line (green line).
- The Decision Line is where wrong-direction crossings are detected. It should be drawn across the entrance as shown in the screenshot. The blue arrow indicates the direction of movement that will trigger an alarm. This direction can be adjusted in the “Lines” tab (see Section 4).
- The ROI defines the area where carts are monitored. It is always a square, which can be moved by dragging it across the view and resized by adjusting its corners.
- Place the ROI so that the decision line is roughly centred.
- Size it so that it primarily covers the exit, with additional space on both sides of the decision line (the app needs to see the cart for at least half a second before and after crossing).
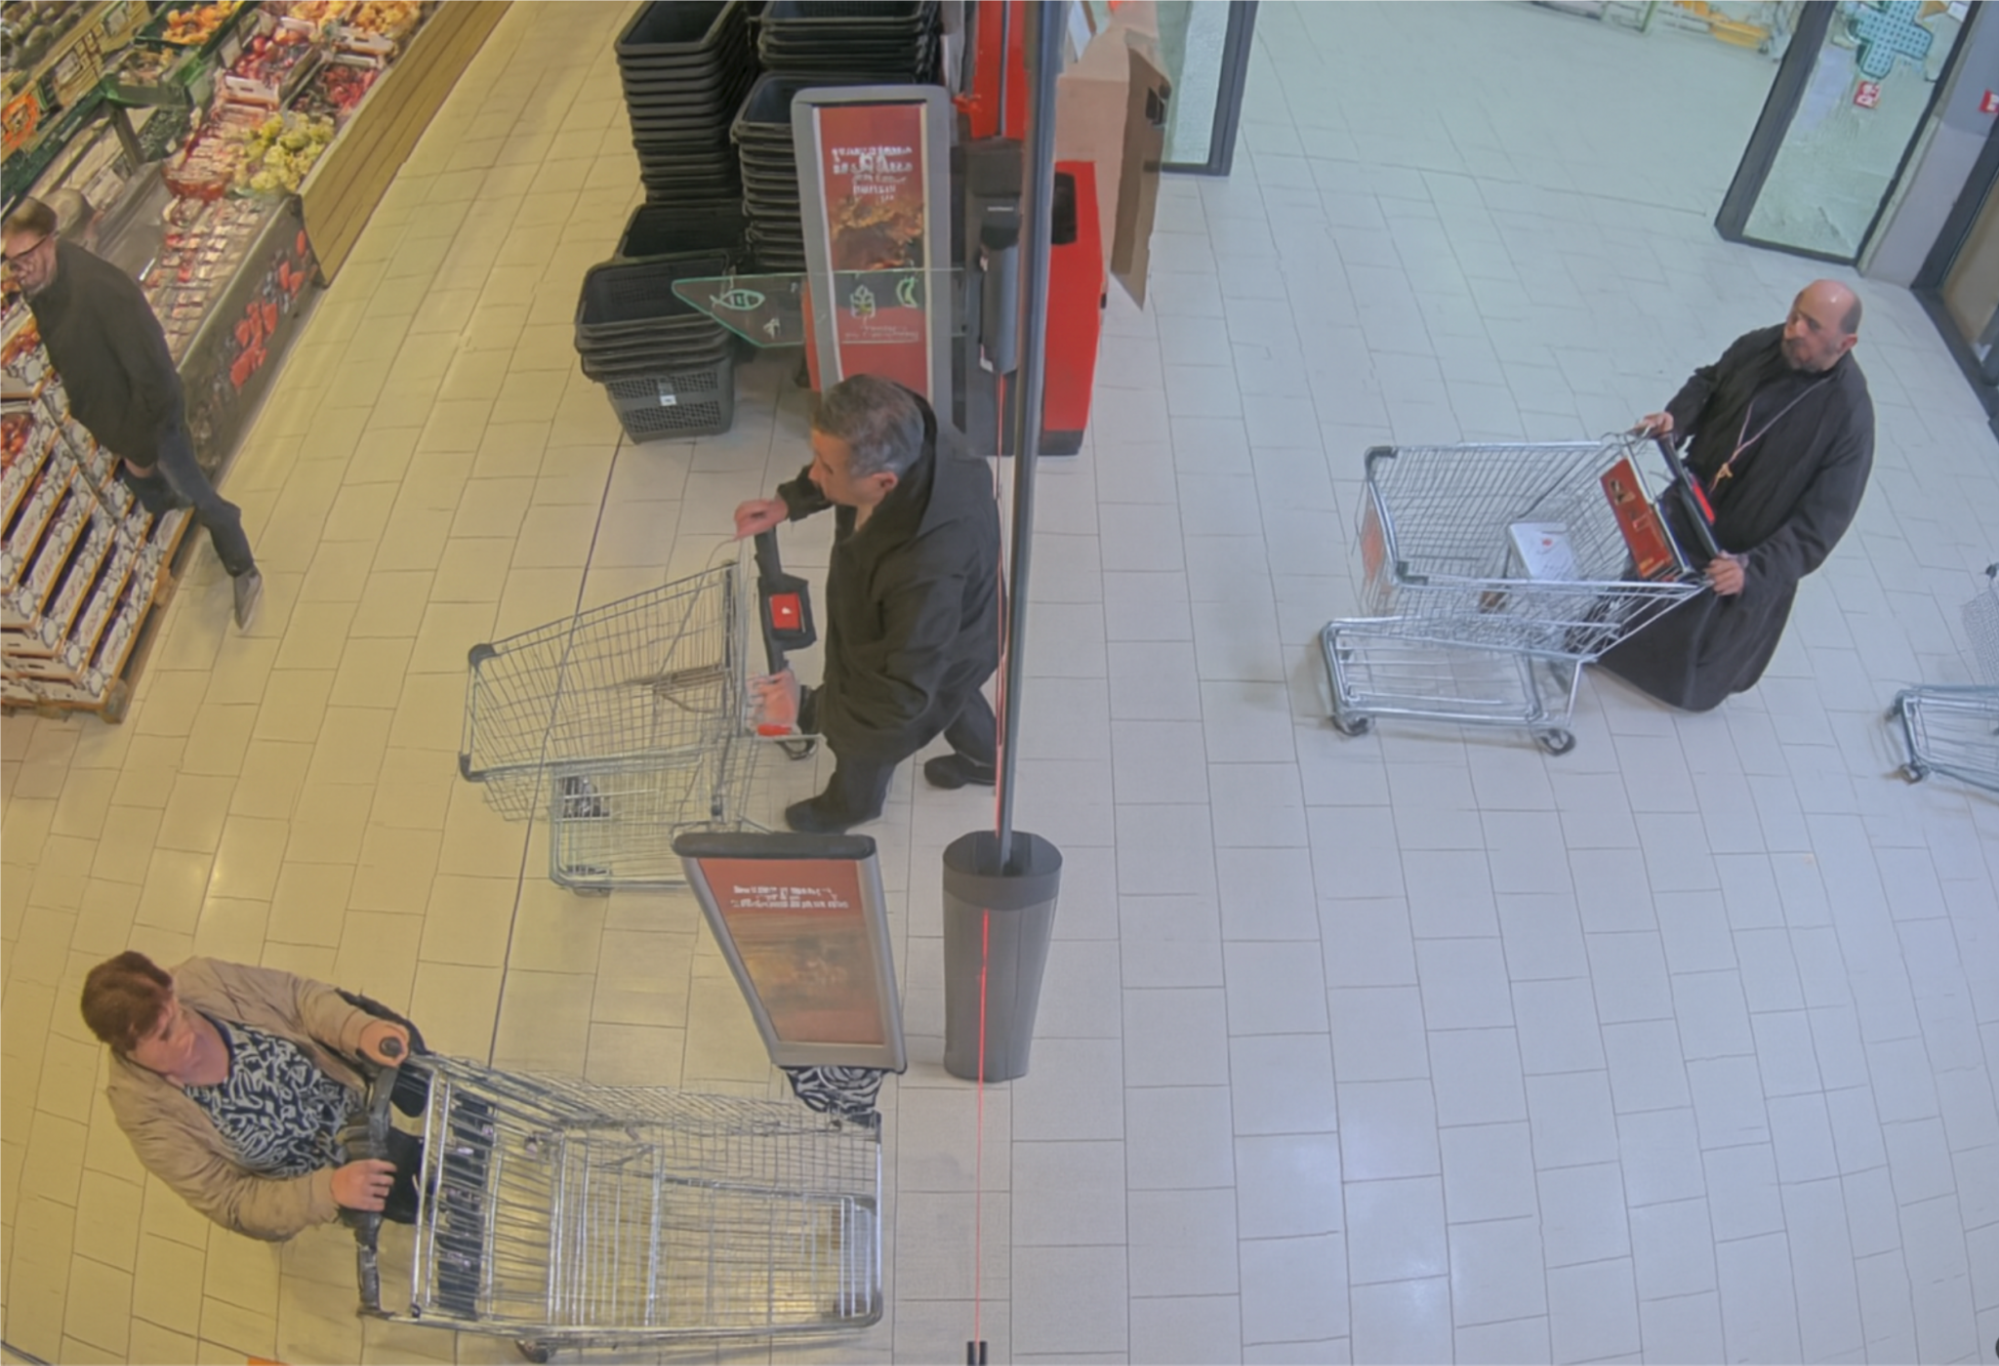
- The additional area should be at least as large as shown in the illustration image—often slightly larger for reliability.
3. Buttons
- Save Settings: Apply and save any changes to settings (ROI, decision line, etc.). After saving, the app may take a few seconds to reset before resuming analysis.
- Alarm Event Test: Manually trigger an alarm event to test integration with external systems. This only works if the analysis module is active.
2. Switches
- Control whether the analysis module is active (this should generally always be ON).
- Toggle whether all cart overlays are shown in the stream (as in the screenshot), or only the overlay of the offending cart when an alarm is triggered.
- Blue = ON, Grey = OFF. In most cases, it is recommended to keep visualisations OFF for clarity.
4. Settings Tabs
- The app has two settings tabs: Line and Tracking Logic. You can switch between them by clicking the corresponding tab.
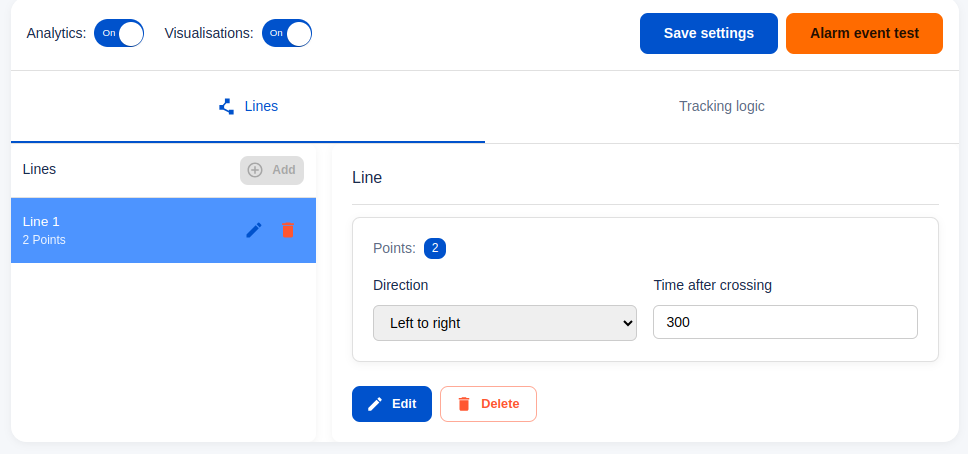
- In the Line tab, selecting “Line 1” in the left-hand menu opens the configuration options for the decision line.

Lines Settings
- Direction – Determines which crossing direction will trigger an alarm. Adjust this using the Direction selector.
- Time After Crossing – Defines the delay after a crossing before triggering an alarm. This should generally remain at the default value.
Tracking Logic Settings
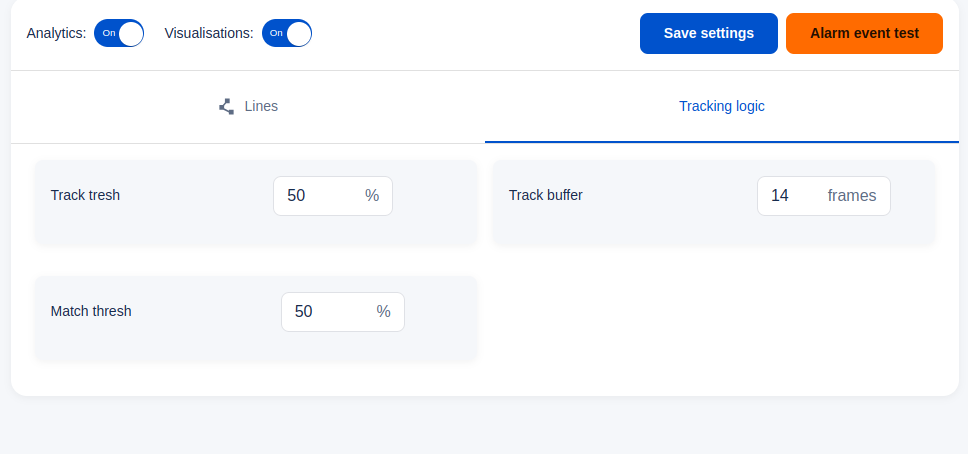
- The second tab, Tracking Logic (shown in the screenshot below), contains settings related to shopping cart monitoring. These values should normally remain at their defaults. However, you may adjust the Track Thresh parameter if needed:
- Increase Track Thresh if objects that are not shopping carts (e.g., pallet movers) are mistakenly detected as carts.
- Decrease Track Thresh if some shopping carts are not being detected.

Saving Changes
After modifying any settings, always click the Save Settings button. This ensures your changes are applied and stored. The app may take a few seconds to reset and resume analysis after saving.
Important notes
- Firmware Compatibility
The app has been tested on FW12. While it should also work on FW11, this cannot be fully guaranteed. Please contact us if FW11 support is required. - DLPU Usage
Ensure that no other applications using the DLPU are running when the demo is active, as they may impact performance. If your setup requires other DLPU-based apps to run simultaneously with Shopping Cart Tracker, please let us know. - Camera Placement
For best results, mount the camera above the entrance, angled to minimise occlusions. Ensure that no objects obstruct the camera’s view.